Showing posts with label quick tips. Show all posts

Monday, March 31, 2014

Crazy about Air Plants! Part 1: What + How

Perhaps you have read this blog and you're thinking, "Michelle, I love plants but I've got a black thumb and all my plants die" or "I am too busy to care for anything" or "I don't have enough space" or "I don't have any dirt -- no yard, no patio, no planters, not even a kitchen window!"

WELL, you are in luck, because there is a plant for everyone, and there is a plant for you.  And it is called the air plant, otherwise known as Tillandsia.

Not only is it literally the easiest plant in the world to grow and take care of, it is also very trendy at the moment.  I present to you the crop top of plants:

So hot right now...


There are actually several different kinds.  You may remember these little guys as the Tillandsia I bought from The Jungle (available for $3 a piece).  There are also several larger varieties (also available at the Jungle for $10 each).

Big mama


If you pay attention, you will notice these plants everywhere -- they are often in installations at restaurants and shops (like Tinga for all my Westside LA people), or being sold in tiny glass bulbs at shops (like West Elm or the Japanese trinket shops on Sawtelle), or on Pinterest.

This variety is often on living walls


And for good reason... they are really easy to grow.  In fact, it is this simple:

Soil--
They do not need soil.  Put them anywhere

Light--
They prefer filtered (indirect) light, so they can go almost anywhere in your house.

Water--
They need minimal water -- some sources recommend a light mist every few days and others (namely The Sunset Western Garden Book which is my favorite gardening guide) recommend a drench every few days, or a soak if the plant gets too dry.  Note that this is contrary to the myth that these plants don't need any water... they are plants, after all.

Fertilizer--
Only if you're feeling very motivated... then you can spritz them with diluted liquid fertilizer.

Easy peasy!

Interesting texture, like grey scales


Some of these plants will bloom brightly, after which point they die (like my other monocarpic plant, the Aeonium), unless they have made side shoots.  One of my little Tillandsia has already made a side shoot:

Baby


So next time you want to buy a plant for your plant-killer friend or baby mama friend or studying for the oral boards friend (oh wait, that's me...), pick up an air plant!  Stay tuned next week for Tillandsia inspiration...

In the meantime, here's a song to pick up your day: Janelle Monae "What is Love" -- I'm kind of obsessed with it at the moment.  Hug your loved one today!


Monday, March 17, 2014

Tulip Saga, Part 2: How to...

It is a little funny for me to be writing a post on how to grow tulips because full disclosure, I bought my tulips this year as budding bulbs already.

Day 1 -- I cheated


In all honesty, Southern California isn't the greatest place for tulips because the bulbs require a good solid winter chill in order to bloom, and that is one thing we do not have -- winter chills.  (I am not sad).  So this being my first attempt with tulips, I wanted to see if they would actually grow, what kind of care they needed, etc.  As you saw last week, they did!  Will I be trying tulips again?  Most definitely yes. 

Little buds and blooms, how cute!


So, from the beginning, here's what to do:

1.  Faking a winter chill:
If you buy bulbs -- and there is good reason to because there are so many more beautiful varieties out there -- you will need to trick your tulip into thinking it is somewhere where tulips belong, like Holland (or Washington State -- who knew?  Though of note, the family in charge of these tulip company are also Dutch).
How?  Your lettuce drawer in your refrigerator will do just the trick.  Refrigerate in a brown bag for 6 weeks prior to planting.  Avoid putting the bulbs near ripening fruit that emits ethylene (like apples) and if your crisper freezes things like ours does, keep it somewhere else in the fridge -- you do not want your bulbs to freeze.


2.  Planting:
If you live on the coast like I do, you will want to plant your bulbs around the holidays.  Ideally, you can find a spot that is shady during December/January and then sunny in February when your tulips are likely to start blooming.  
How?  Well, if you have pots, you can move them, or if your bulbs are in the ground, then you can cover them.  Why?  The shade will help tulips will put down better roots and full sun will prevent the flowers from leaning toward the sun when they've bloomed.
As for soil, well-draining soil is best.  If you've grown tulips in the same spot/pot previously, either replace the soil or plant your bulbs elsewhere.  Plant them a couple times deeper than they are wide and water daily.  Fertilizing with nitrogen based plant food before bloom is recommended, particularly if you plan on keeping your bulbs.


3.  After-care:
If you want to try to keep your bulbs for the following year, wait until the leaves wither and then dig them up (in the fall) and keep them in a cool dry place (like your garage) until you're ready to fake them out in the fridge again.  The problem is, this apparently doesn't always work that well -- the following blooms end up being shorter and smaller than the previous years... if they even bloom.  There are some exceptions, but the SoCal gardening sources I am using suggest buying new bulbs every year.
If you do have great success with replanting bulbs, wonderful!  At some point, as with most bulbs, they will grow big enough that you should divide them, which you should do in late summer.


4.  Trouble-shooting:
Potential pests include squirrels (they try to dig bulbs up -- this happened to me this year!  Fortunately, it gave up or failed), slugs/snails, and aphids.  You can cover your just-planted bulbs with chicken wire and there are sprays for the other slimeys and suckers.  I had a short-lived aphid issue on one of my tulips that disappeared as soon as I doused some Neem oil on.


Besides that, all there is left to do is enjoy!  


As of now, I think I will try to replant my bulbs, just to see what happens.  Right now, there's still some serious foliage going on though, and they're in a planter I would like to use for other purposes, so I will either have to plant around them or just keep on looking at the tulip leaves for awhile.

Lastly, for all my LA folk, unless you were a VERY deep sleeper, you experienced the earthquake this morning... 4.7 in the Santa Monica mountains!  As a Texas-bred girl, I realized today that I know what to do in tornados, but not in earthquakes.  So I looked up some earthquake safety tips and am sharing them here for your reading pleasure!

Sources for today's post include The Sunset Western Garden Book and Pat Welsh's Southern California Organic Gardening.

Tuesday, July 30, 2013

Evan's favorite

I am not sure which one I would have expected to be my husband's favorite plant in my somewhat broad indoor/outdoor collection of flowers, but it is definitely not this one:


Evan's favorite plant, also known more formally as Kalenchoe blossfeldiana, is a type of succulent, of a larger family of Kalenchoe plants.  In fact, if you have a good memory, you might recall that I actually have another type of Kalenchoe plant, of the magical notoriety.


And just in case you don't believe me, here is another picture of it as a baby.  See, it's written right there on the pot.  


Anyhow, these are actually quite popular as gifts, so you have probably seen them at your local Whole Foods.  In the past, I had actually always seen them in their single petalled version, like so (sources here and here):

File:Starr 080117-1759 Kalanchoe blossfeldiana.jpg

File:Kalanchoe.blossfeldiana.jpg

I did not actually become aware that they existed in this other multiple petalled type until we went to the Keukenhof where in addition to tons of tulips outside, they were also having a flower show.  One of the flowers featured was the Kalenchoe blossfeldiana.  And it was here that Evan decided he liked them.

Wow! And in Dutch orange!

In the interest of keeping things short and sweet, I will not say too much about them.  I'm feeling bullet points today...  blooming Kalenchoe care:
  • They're easy to grow with long-lasting flowers--  a great starter plant
  • Plant in well-drained soil (preferably cactus mix)
  • Lots of sunshine (they're succulents, remember)
  • Not too much water, especially if they're not flowering (they're a succulents!)
  • When the blooms turn brown, cut them off so that they will re-flower
  • They generally rebloom in the spring, but there are ways to "force" reblooming by altering how much light/dark they are exposed to.  (That's Kalenchoe advanced, so we'll save it for another time.)
And that's all you really need to know to keep your Kalenchoe alive!  After all of the flowers turned brown, Evan insisted that it had died and we should throw it away.  Fortunately, however, I trimmed the dead blooms, and sure enough, it rebloomed (and I didn't even have to wait until spring!).  So it's still his favorite.

Look how much it's grown!

Finally, here's the track of the day, both because it is also Evan's current favorite (he has good taste-- this woman can sing) and because my brother-in-law and very soon to be sister-in-law are getting married this weekend.  Congrats Cal and Rachel!

Tuesday, June 11, 2013

Quick tips for cut flowers

Don't you hate it when you buy flowers and they seem to die instantly?  Here are a couple tips to help with that.

Quick tip of the day #1 -- Trimming the stems:
First off, don't just stick your bouquet in the water.  You need to cut the stems at a 45 degree angle.  A Dutch family trick is to also make an additional cut 1-2cm directly up the length of the stem from the bottom.  All of this exposes more of the water-absorbing portion of the stem to the water.  You also need to trim off any leafy debris and extra stems below where the water line will be.  Otherwise, they will decay and shorten your flowers' life.

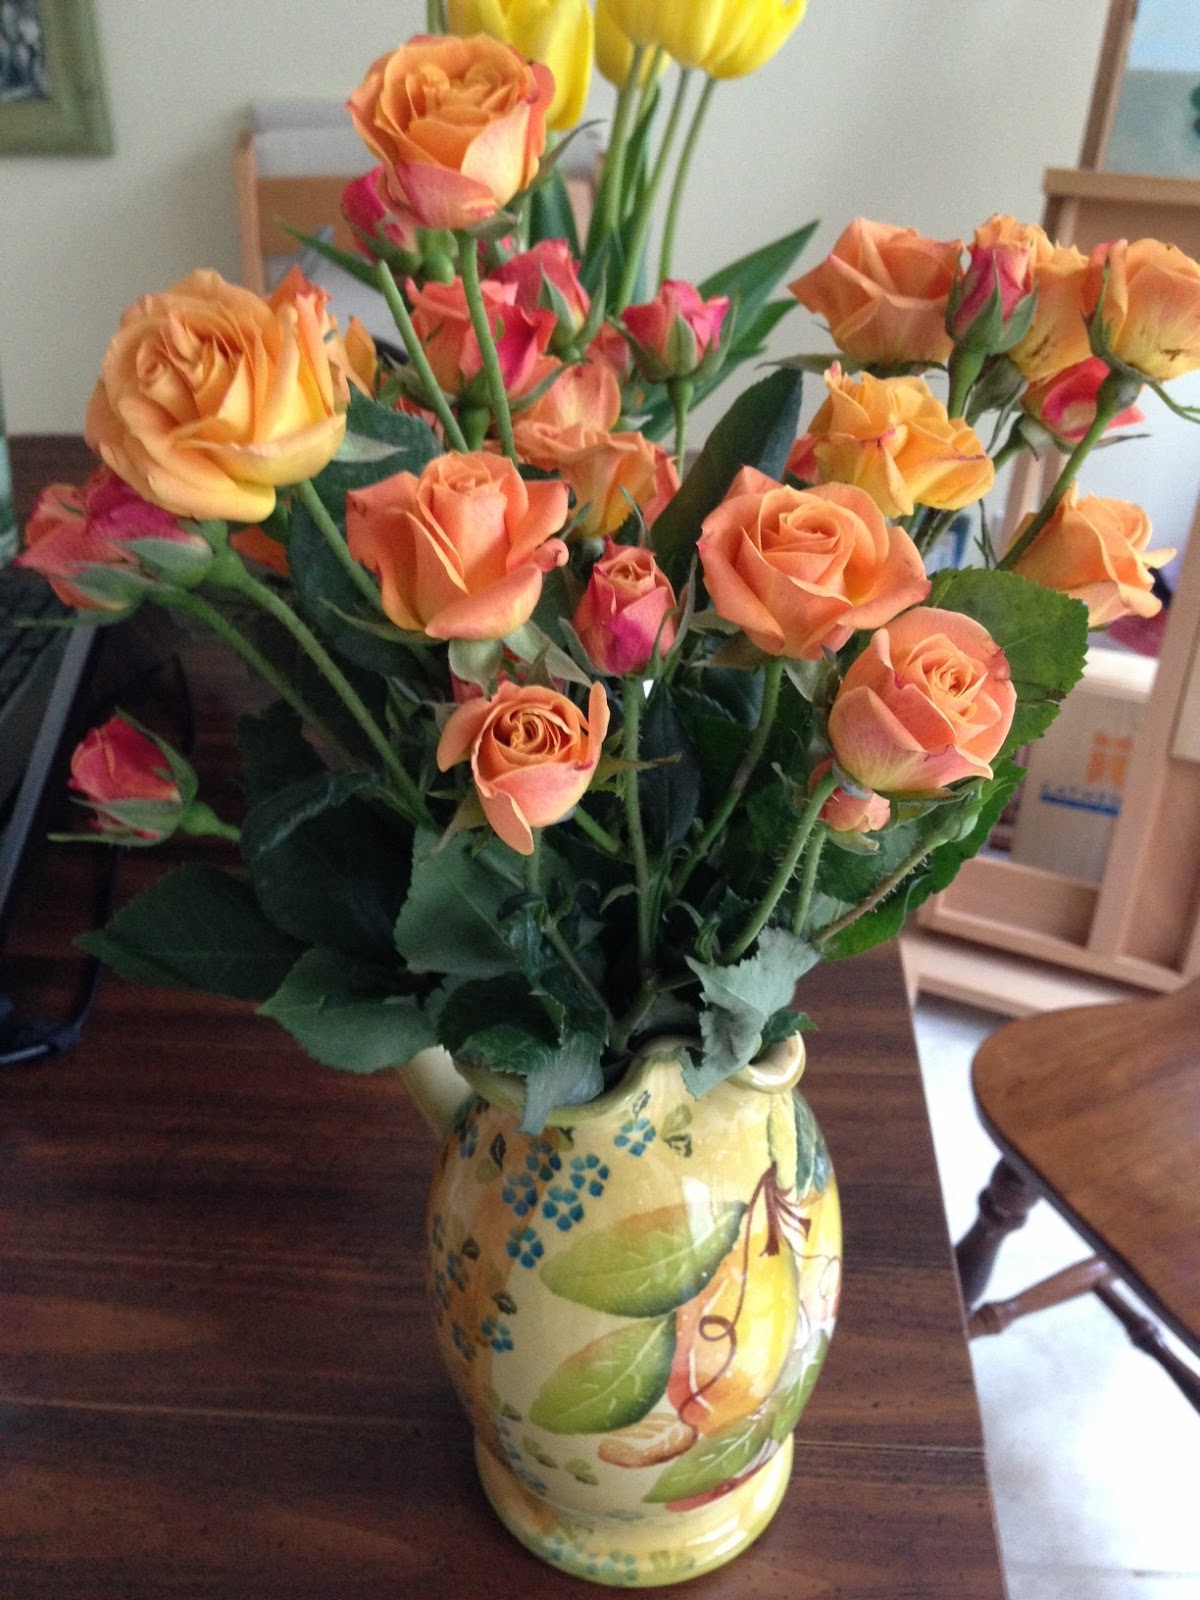
Spray roses

Quick tip of the day #2 -- Conditioning the flowers:
To keep your flowers standing up straight, when you buy them put them in water for 4 hours after trimming the stems but before taking off the wrapping so that they are propped up straight in the vase.  After 4 hours, remove the wrapping, and your flowers will be in good shape!  You will notice the difference with flowers with softer stems such as tulips which have a tendency to droop at the stem when they wilt.

Tulips!

Quick tip of the day #3 -- Additives:
I've heard (and tried) everything from adding Sprite, pennies, and straight sugar to the water in order to extend the life of my bouquets.  None of those worked and I have personally had better experience with just plain water.  But some sources suggest additives both to feed the plant and also kill any bacteria.  That's why sometimes flowers come with little flower food/preservative packets attached.  If there is no handy packet, you can try this little recipe, provided by the UCDavis Division Agriculture and Natural Resources (scale up or down as needed):
Flower food/preservative:
2 Tablespoons lemon juice
1 Tablespoon sugar
1/4 teaspoon bleach
in 1 quart of water

Make sure to replenish the water regularly and if you notice any gross moldy-type consistency, then completely replace the water, trimming the stems and cleaning the vase again before putting the flowers back in the vase


The flowers pictured are both bouquets from the party we had this weekend, now on day 3 of being in a vase.  As you can see, we are kind of obsessed with painted ceramic pitchers at the moment, both procured during our trip to Italy... pitchers make great vases!  (That is a decorating tip from Evan, my interior decorator/husband)