Showing posts with label trends. Show all posts

Saturday, June 22, 2013

The Pretty Pot: "Thriller Filler Spiller"

Recently, Evan asked if i might plant something nice by our front door.  Obviously, the answer was yes.  This afforded me the opportunity to buy new plants, explore the world of shade plants, and also come up with a pretty display pot.  It is an art, if you let it be one.

So how do you pick the perfect pot of plant?  First there's the pot, which I won't say much about.  You need to consider your space which affects the size, shape, and color of pot you will choose.  There are also a variety of types of pots available -- ceramic, plastic, terracotta, metal, wood...  it's a topic we can cover another day.  

Then there's the type of plant which will grow well in your pot.  What is the microclimate of the pot's location?  Sun, part sun, shade?  Is the pot one that will dry out quickly?  Is it very hot or windy?  All things that will narrow down your plant selection, and thank goodness, because I have a hard time choosing regardless.

What I really want to talk about is something that is not a new concept in the garden world:  "Thriller, Filler, Spiller"... which makes me inevitably think of Bob Marley singing "Iron, Lion, Zion" every time.  It's a cheesy name that kind of sucks, in my opinion, but I must give credit where credit is due, sort of...  I did not come up with this concept.  But really, neither did the garden world.  It's kind of like the background, middleground, and foreground in art.  In essence, you want something eye-catching and tall in the back, something fairly leafy and space-filling of medium height in the middle, and something short and ideally trailing in the front.

Enough words, let's do some pictures:


Having just been to Italy, I picked a plastic (lightweight!) pot with a Tuscan-esque design and color on a stand to bring the small plants closer to eye level.  

Then I picked my thriller, which was easy -- I have thought fuchsia plants were gorgeous since I saw them in my aunt's garden in Holland.  They do have a proclivity towards developing mites, but I am pre-armed with spray.


It was much more difficult to pick the other plants.  After more than 30min of walking back and forth at Armstrong in indecision, for the filler, I picked Variegated Helichrysum and for the spiller, I chose Muehlenbeckia.


Why?  I wanted a variety of colors and shapes of foliage.  I thought the Helichysum was a nice contrast with the silvery light green that also matched the accent color of our apartment.  Also, the Muehlenbeckia had nice small leaves in a tangle of dark green to contrast the other two plants.  


I absolutely love the fuschia so I stuck with other leafy plants so that other larger flowers wouldn't detract from the delicate look of the fuschia flowers.  But there are tons of options.  Perhaps in another pot, one could do pink impatiens with trailing ivy with a tall purple leafy plant of some sort in the back.  Here's a few examples from the web (Sources linked here: 1st, 2nd, 3rd, 4th):


And they are all beautiful and different in style!  I have noticed that other people (at least on the interwebs) tend to plant their pots significantly tighter than mine.  How do their plants have space to grow?  Anyway, I planted this pot about 1 month ago, so it is slowly filling out beautifully.  Updated photos to follow!  And remember, next time, you want to plant a pretty pot, think "Thriller, Filler, Spiller"  (or Iron, Lion, Zion).  Happy planting!

In baby stage, welcoming guests


Wednesday, April 10, 2013

On vertical gardening

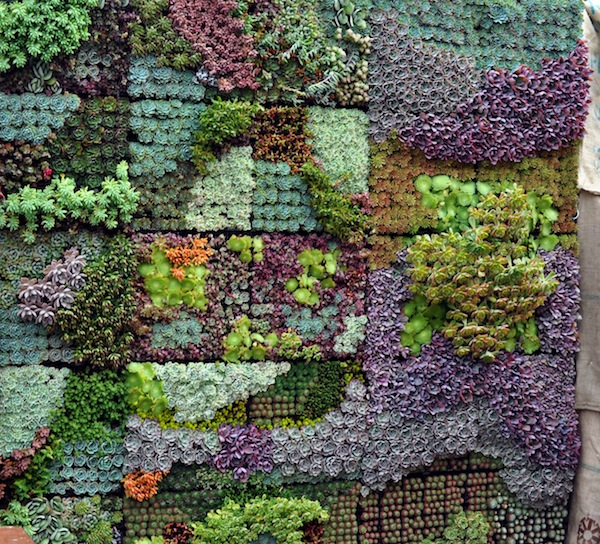
So if you follow Pinterest at all, you probably know:  vertical gardening is popular.  At least in the pinning world.  

Vertical gardens range from the very elaborate (here is the how to)

yes, there is actually a how to...

To the more doable (another awesome how to)

The pallet vertical garden

The advantages are obvious to any balcony gardener-- maximum plant in a small space!  Plus, they are more visually delightful than a plain wall, and I would add that it is really wonderful to have plants that you might not get to see up close at eye level.  You can appreciate the smells and delicate features of tiny flowers which may usually be ground cover so much more.

The primary downside, in my opinion, is that watering is much more complicated.  The top dries out a whole lot quicker than the bottom because the water seeps down slowly hydrating the bottom far more than the top.  This is heightened by the fact that my planter is made of felt which already dries out quickly and likely the reason so many of these vertical gardens you see are with succulents.  Last year, when I bought this planter, even with regular watering, I had a hard time keeping my top plants alive even as the bottom thrived.  

But live and learn... this weekend, I replanted my very basic vertical garden with this wetness differential in mind.

Not as fancy, still vertical and great

In order from top to bottom, we have row 1: Dipladenia and the Santa Barbara Daisy, both very drought resistant, particularly as the Santa Barbara Daisy is a California native plant.  Row 2: French Thyme and Alyssum, of moderate water needs, and Row 3: a Figaro dahlia and mint, specifically mentha spicata (more on that in a later post).  Here's hoping this year's mini-vertical garden thrives!

This is what I mean by eye-level awesomeness


Tuesday, April 2, 2013

Arts + Crafts: Wine crate herb box

Every time I go outside or look out the window and see my herb box, it makes me happy.  As mentioned before, it was a bit more of a laborious process than expected, with two visits to the hardware store, a long visit to Michael's <shudder>, and multiple days required to drill the holes because my drill kept dying.  But  the end result was worth it!  And if you learn from the few small hangups I had, this is actually another very easy project.

First, you need a wine box.  As mentioned before, you can either beg one of a specialty wine store, or you can just buy one from winepine.com like I did.


Next, grab your tools.  I made my holes 7/8" in diameter.  There are drill bits especially made to drill holes through wood, just make sure they fit your drill.  The first bit I bought did not fit my "lady drill" (as the hardware store clerk called it), but I found another one that did.


Space your holes out for even and adequate drainage.  I do not know what the perfect number of holes is, but I decided on eight.  My lady drill, which is awesome as you can see, was plenty adequate... once it was charged.  (Next time, I will think ahead and charge it overnight the preceding night).


To avoid having all your dirt fall through the holes onto your patio, I recommend placing some sort of mesh over the holes.  After scouring Michael's, I found this plastic craft mesh, shaped like hearts, no less.  It worked perfectly!  I glued it in place with regular craft glue.


Next comes the fun part... pick your plants and plant away!  Take notice when you choose your plants that many wine crates (mine included) are only 7" in height, with individually sold plants often already in pots around 5" tall.  That does not leave too much room for soil at the bottom.  I probably would have chosen smaller plants if they had been available.


Now for some accessories -- to avoid root rot and water damage to your patio, little plant stands are great.  Also, another lovely addition is a plant nanny to make sure your herbs stay hydrated.  To use, place a an old bottle of wine, filled with water, upside down into the cone.  The water will slowly seep out through the terracotta.  This is more important if you sometimes neglect your plant babies or you have less drought tolerant herbs in your box. 


And then you're done, with a beautiful and functional wine crate herb box you can be proud of!  


Sunday, March 31, 2013

The Perfect Herb Box

At long last, I finished my wine crate herb box project.  Introducing the perfect box of herbs:


This wine crate thing really ended up being a labor of love (more on that later), but I'm pretty happy with it!  Here's a top view:


Top row from left: flat leaf parsley and dill.  Middle: Spanish lavender. Bottom from left: Italian large leaf basil and trailing rosemary.  in the very back, I've got a plant nanny with a wine bottle (get it? in the wine crate? yay!).  If it wasn't so functional -- I tend to be a neglectful gardener when I get busy -- then it might be overkill, but I suspect it will help keep my parsley and dill alive since they will probably require more moisture.  

Right now, they're organized by current height, but ultimately, the basil will be quite tall, hopefully the rosemary will trail over the side, and in the long term, the lavender which is a perennial will grow bigger and bigger until hopefully taking over the whole box.  Then I will have a wine box of lavender -- also wonderful :)  For now, cheers to herbs!

Tuesday, March 19, 2013

Arts + Crafts: Gilding terracotta pots


Well friends, this past weekend I had a one woman crafts extravaganza during which I gilded a couple terracotta pots with the ultimate plan to use them for my succulents.  It was as exciting as it is unusual for me to do crafts.  I love artsy stuff and like to think I'm alright at amateur art, but crafts I pretty much never do, both because I typically lack the patience required to get a project completed and because I hate Michael's (it is SO hard to find anything there).

Nevertheless, after seeing really cute Pinterest'd gilded pots and blogs like this and this explaining how easy it is, I had to give it a shot.  And it's not that hard!

First, you need your materials.


I bought a gilding set for $11 which included everything as except for the sponge paintbrushes which were $0.50 each, but you can just as easily buy all your supplies separately.  
Specifically, you need:
-The soon to be golden terracotta pots
-Gold Leaf
-The special adhesive called "Size" (some sources suggest Elmer's spray adhesive works too)
-Sealer (Spray sealer works too)
The kit also came with a red basecoat and "Antiquing glaze" which I ignored.

First, liberally apply adhesive to the pot.  I used two wet coats, and try to minimize bubbles.  As soon as the adhesive is applied, quickly lay a gold leaf on top.  It will cling to the pot (and everything else) like super-thin gold clingwrap.  Before I started, I wondered how I would get it to look so imperfectly perfect... turns out that was not a problem.

Adhesive
Gold leaf'd
Next, push any gold leaf still flapping in the wind down with a little brush or sponge.  This is harder than it sounds because the second your fingers or little sponge get adhesive on it, the gold leaf will stick to your fingers/sponge instead of the pot, with the result that each tappy tap rips pieces of gold leaf off your pot.  Proceed with caution.


Once you've covered your goal area (usually, top of the pot or just one side), brush off any loose pieces of gold leaf with a paper towel, and then apply sealer liberally to the gold leafed area.  While you want to cover the edges as well for a good seal, painting on the actual pot will change the color somewhat.  Two coats seems to be enough.


Once your pots have dried, celebrate with a glass of wine or a fist pump or something, because your pots are ready for planting and you, ladies and gents, have graduated to crafty lady status!

I am a crafty lady